


Video conferencing
Video conferencing is a technology that allows users in different locations to hold face-to-face meetings without having to move to a single location together. This technology is particularly convenient for business users in different cities or even different countries because it saves time, expenses, and hassles associated with business travel. Uses for video conferencing include holding routine meetings, negotiating business deals, and interviewing job candidates.
After this pandemic all we know the importance of video conferencing and video telephony softwares.
Some famous video confrencing tools below.
Skype
Zoom
Microsoft teams
Google meet
Here we are going to configure Jitsi the open source video conferencing server.
Requirements:
Ubuntu 18.0 server
1 Gb Ram 1 Core Processor with 8 Gb of diskspace(minimum requirement)
- Domain name A record already pointed to our servers public ip
Installation Part
First we are going to update our server
So we change the root user execute all the commands.
sudo su
apt-get update -y
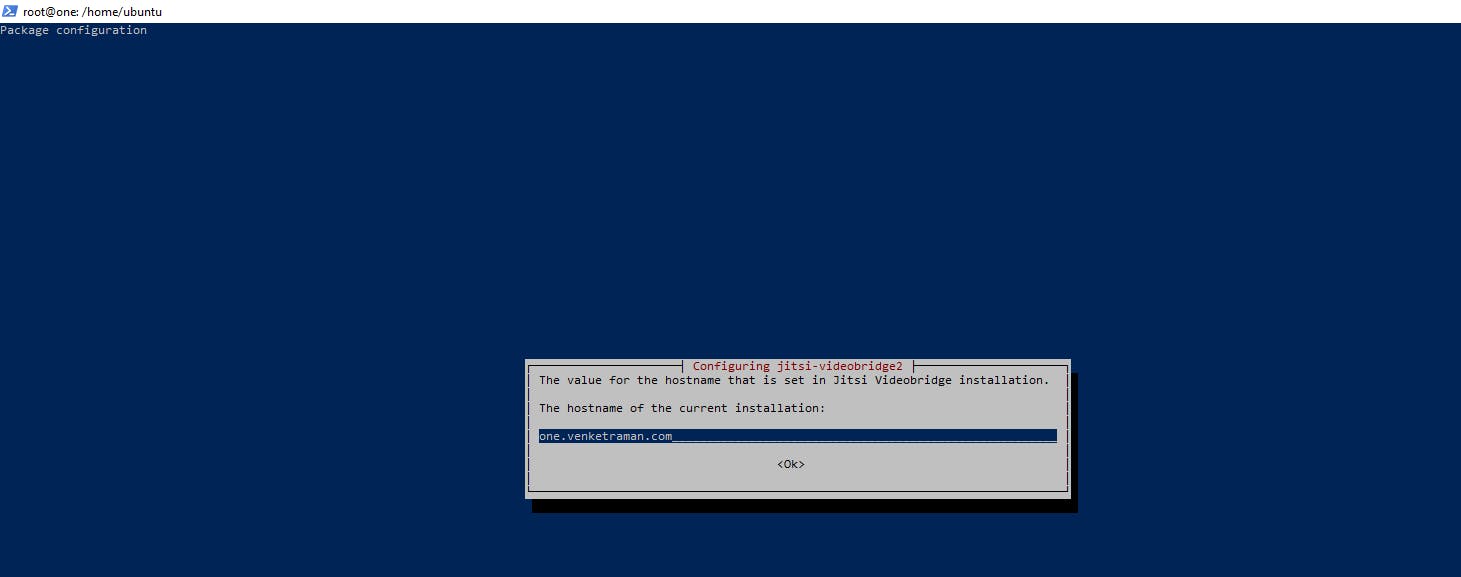
Then configure hostname of our server
hostnamectl set-hostname one.venketraman.com

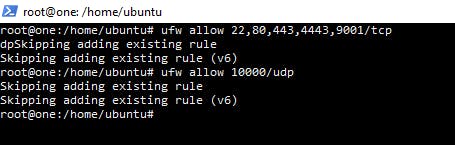
Allow the required ports in firewall and enable it
ufw allow 22,80,443,4443,9001/tcp
ufw allow 10000/udp
ufw enable
ufw status verbose
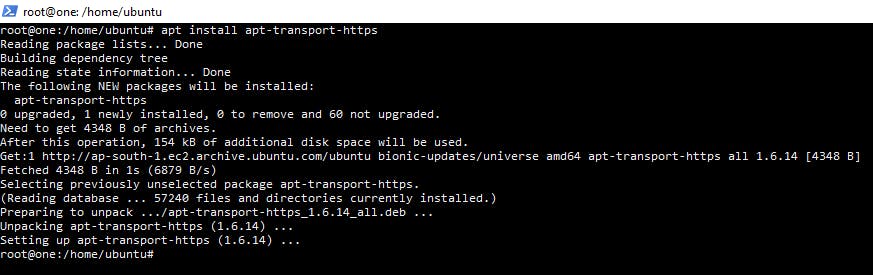
we have ensure support for apt repositories served via HTTPS
apt install apt-transport-https
On Ubuntu systems, Jitsi requires dependencies from Ubuntu's universe package repository. To ensure this is enabled, run this command:
apt-add-repository universe
The below command will add the jitsi repository to your package sources to make the Jitsi Meet packages available.
  curl https://download.jitsi.org/jitsi-key.gpg.key | sudo sh -c 'gpg --dearmor > /usr/share/keyrings/jitsi-keyring.gpg'

  echo 'deb [signed-by=/usr/share/keyrings/jitsi-keyring.gpg] https://download.jitsi.org stable/' | sudo tee /etc/apt/sources.list.d/jitsi-stable.list > /dev/null

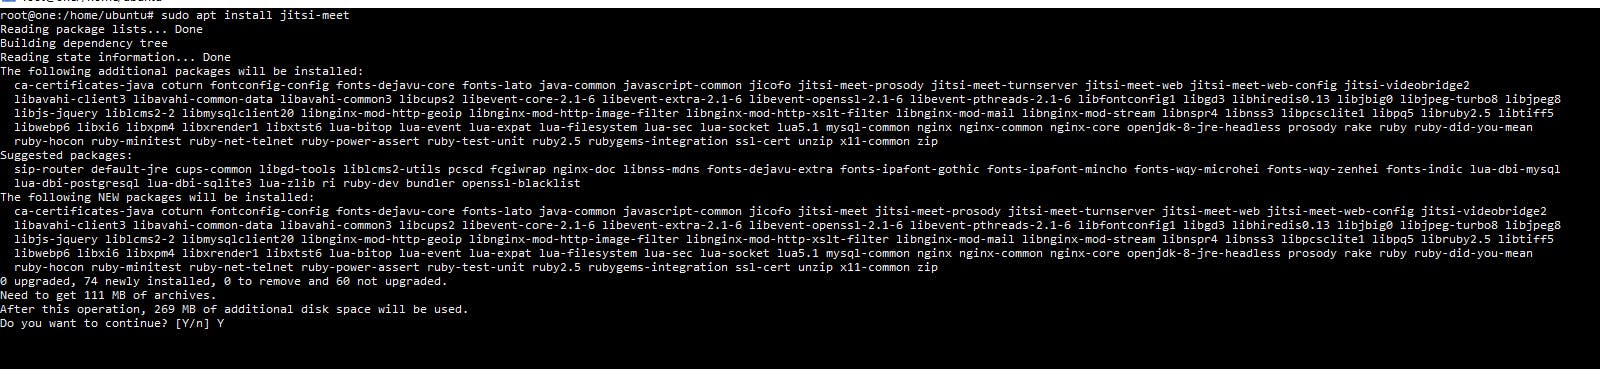
Now we are going to install gitsi package on our server.
sudo apt install jitsi-meet
During the installation its asks Enter the domain for our meeting server. we will configure the servers public ip point to the domain name before entering here.
after give ok,it will ask the certificate installation method.

we will select
Genrate a new self-signed certificate
The jitsi instalation is finished.
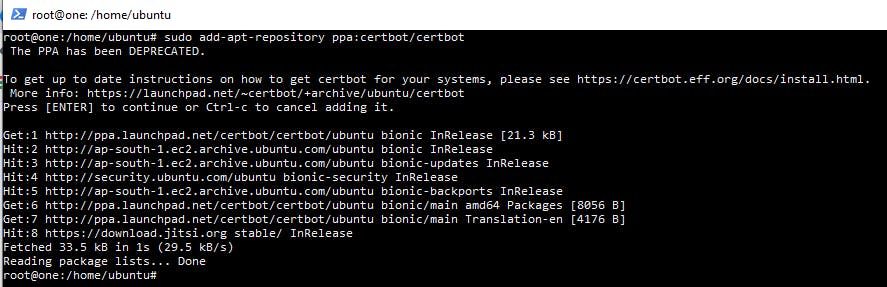
now we are going to configure SSL certificate for this server.
for that first we need to Certbot PPA to our server
sudo add-apt-repository ppa:certbot/certbot
After adding this wewill install the ssl .Jitsi meet package alredy have the ssl certificate instalation script. we just want execute the script now.
sudo /usr/share/jitsi-meet/scripts/install-letsencrypt-cert.sh
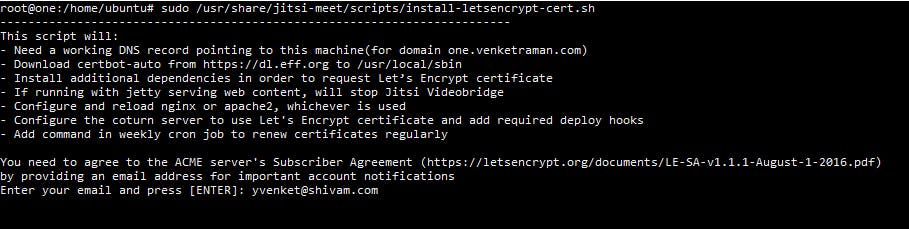
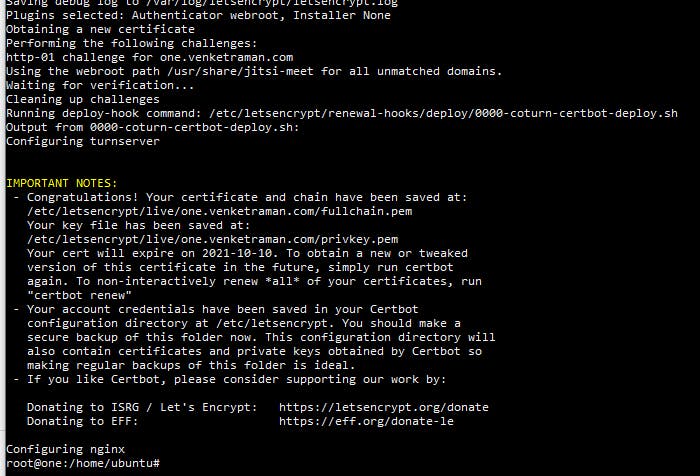
During the ssl installation its asks the mail id for cert renewal notice.after entering that you will got the message like this.
Now we are going to open our meeting server using configured domainame
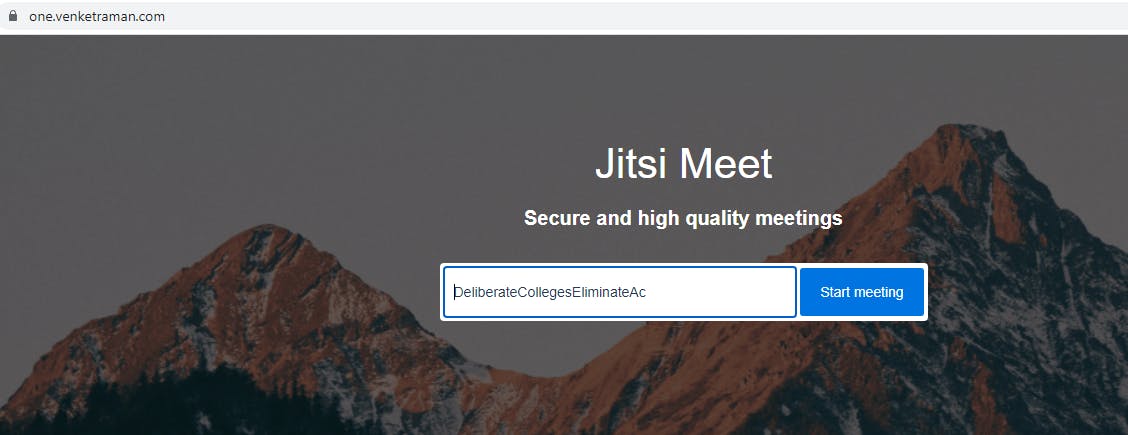
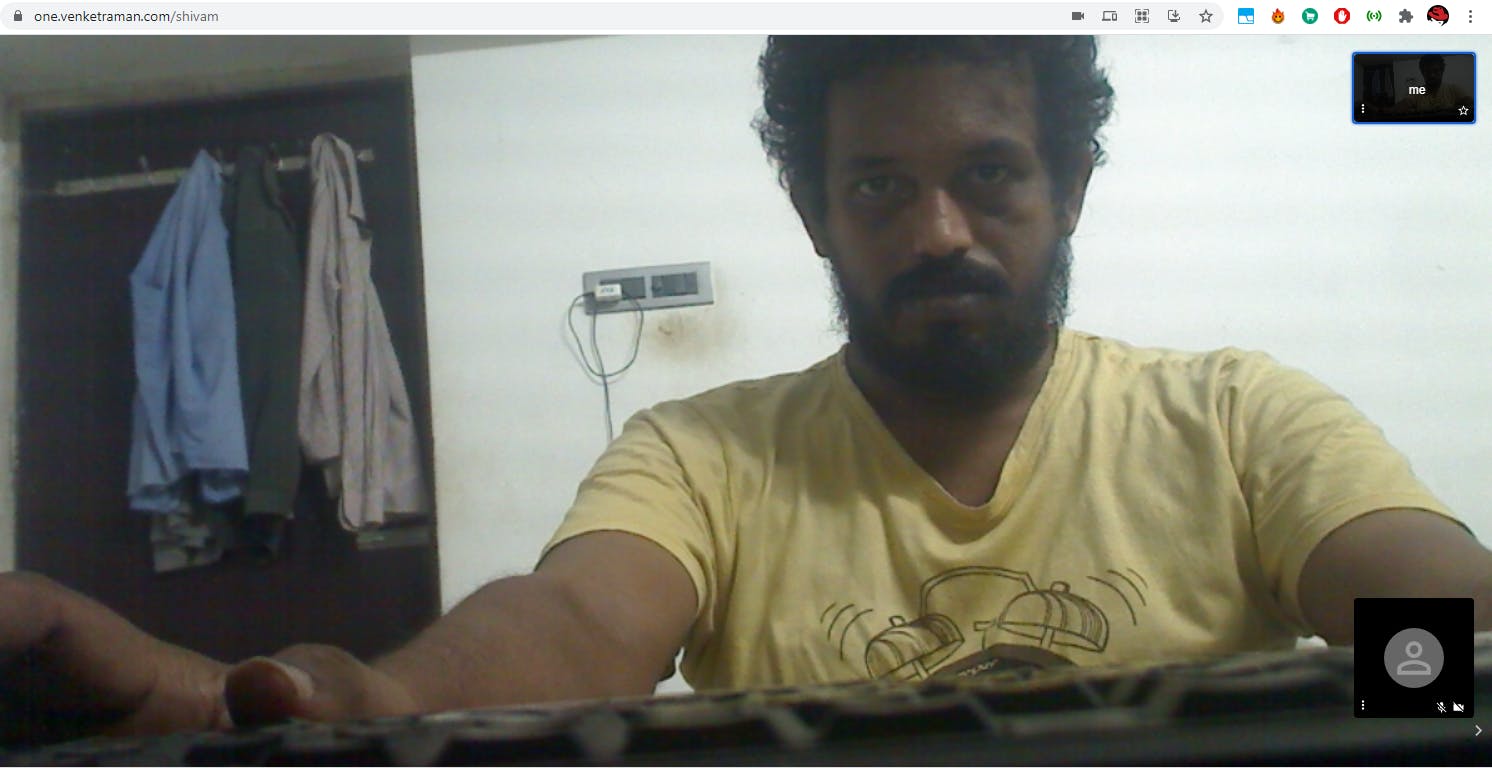
After giving the room name you can join the meeting and invite your friends.
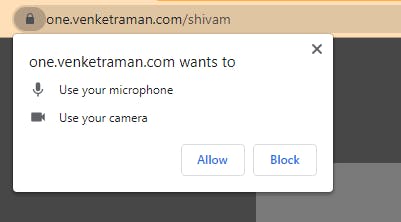
During this Browser asking microphone and camera permission to allow this website.
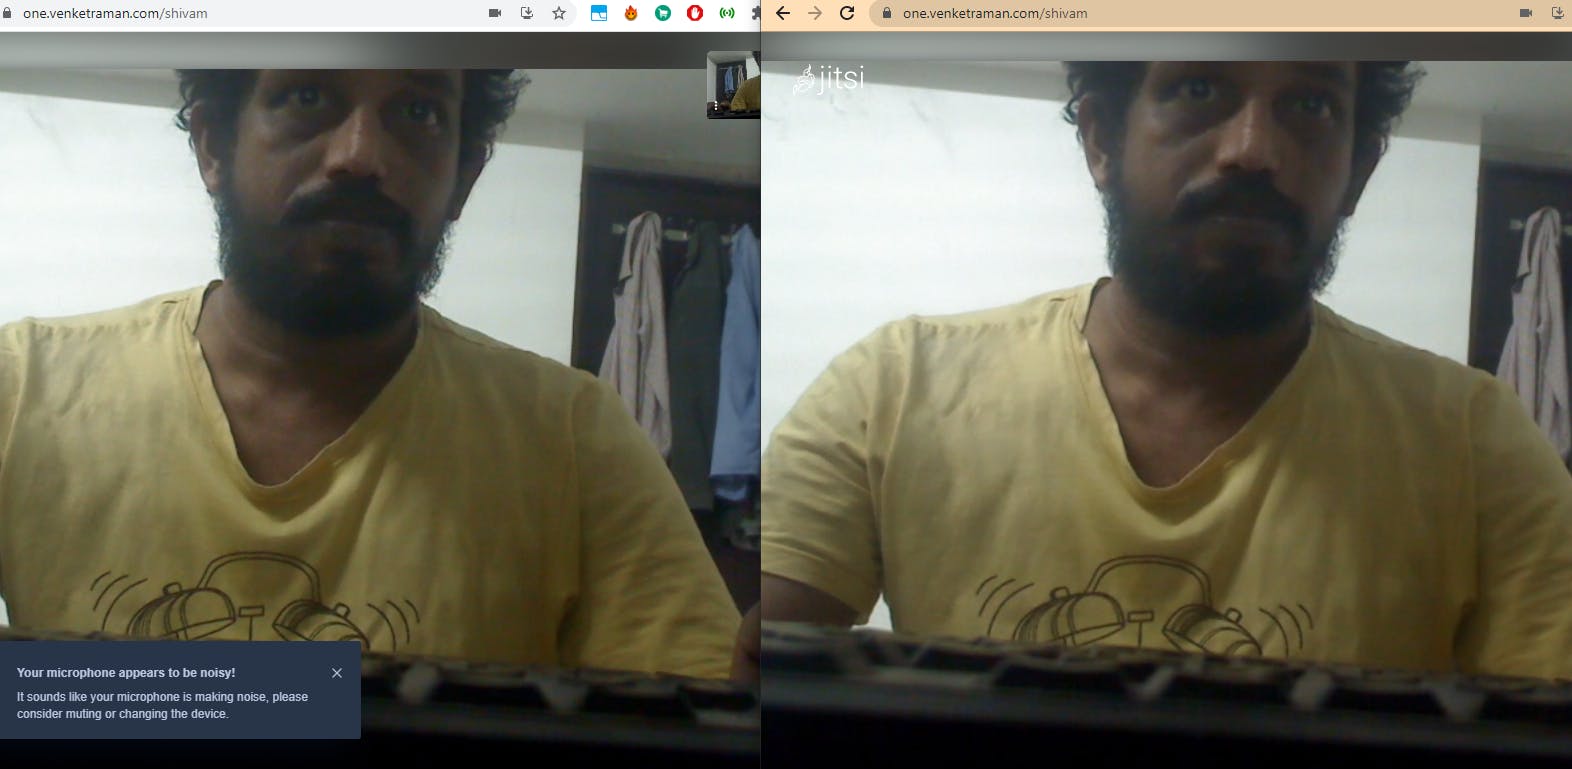
For testing purpose here i am open the meeting room in two different browsers.
The Jitsi Server installation and configuration is finished.