Create Custom VPC IN AWS
Create Public and Private Subnets and launch EC2 on It
VPC - Virtual Private Cloud
Amazon Virtual Private Cloud (Amazon VPC) enables you to launch AWS resources into a virtual network that you've defined. This virtual network closely resembles a traditional network that you'd operate in your own data center, with the benefits of using the scalable infrastructure of AWS.
- Amazon VPC is the networking layer for Amazon EC2.
The following are the key concepts for VPCs:
Virtual private cloud (VPC) — A virtual network dedicated to your AWS account.
Subnet — A range of IP addresses in your VPC.
Route table — A set of rules, called routes, that are used to determine where network traffic is directed.
Internet gateway — A gateway that you attach to your VPC to enable communication between resources in your VPC and the internet.
CIDR block —Classless Inter-Domain Routing. An internet protocol address allocation and route aggregation methodology.
1.Create VPC
- So We will going to create VPC With the Below Network value 10.0.0.0/16
- Open VPC Console on AWS.

- Config Screen
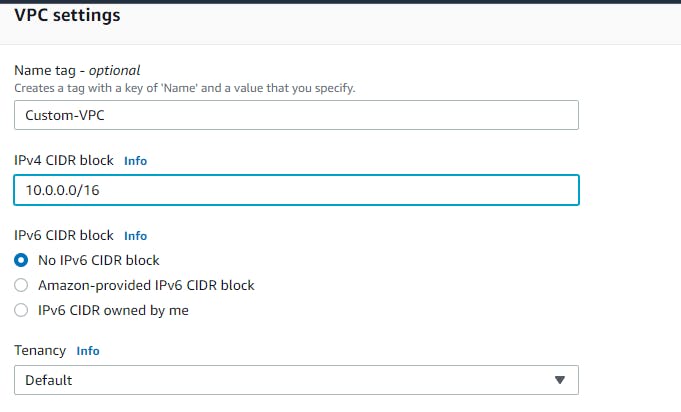
When you create a VPC a Route Table, Network ACL, and Security Group are automatically created.
Subnets or Internet Gateways are NOT automatically created, so we’ll create those below.
2.Create SubNets

- We want to create the 2 subnets.
- 1 subnet is public other 1 is private
- The below values i have assigned to my subnet.
Public-Subnet
Availability zone : ap-south-1a IPv4 CIDR block : 10.0.1.0/24Private-Subnet Availability zone : ap-south-1b IPv4 CIDR block : 10.0.2.0/24
Public Subnet
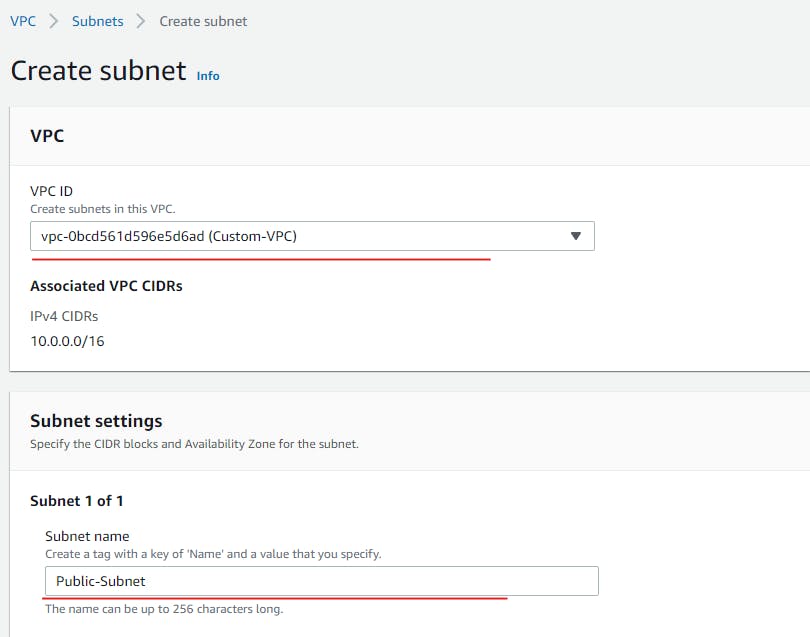
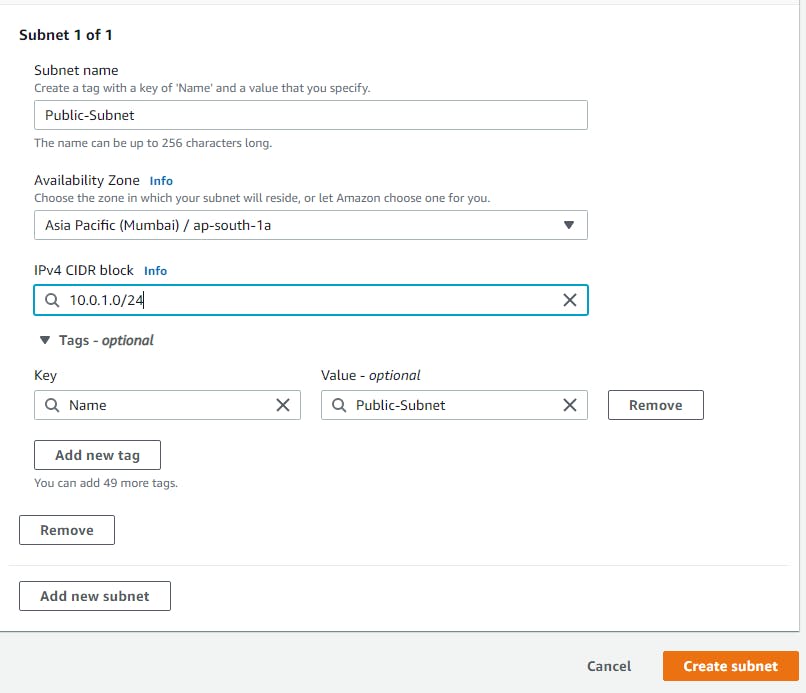
Private Subnet
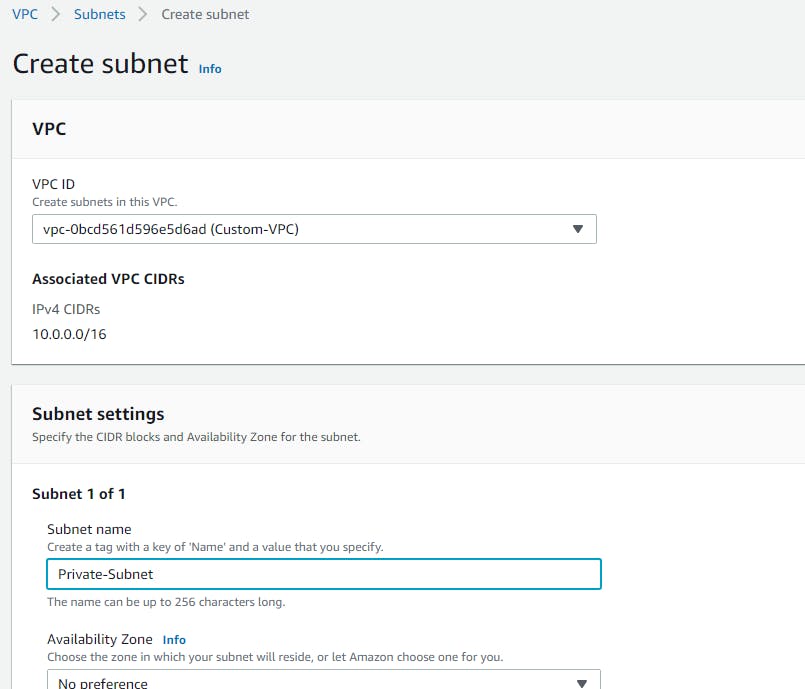
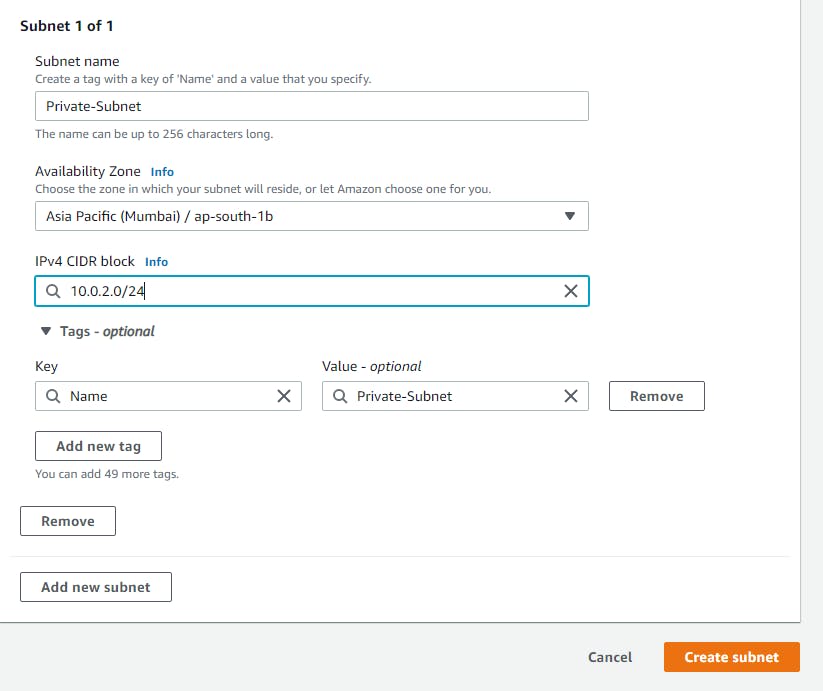
- Now Our Subnet screen looks like.

3.Create Internet gateway
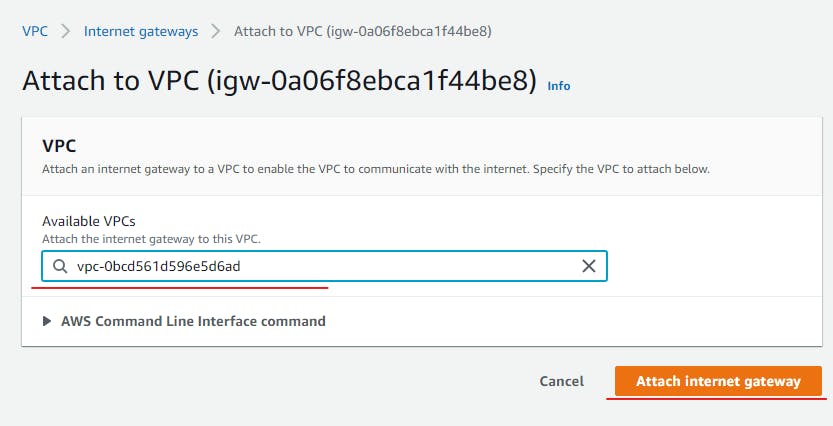
- Now we want to Create Internet gateway and attach it to custom VPC so that the VPC Will get the internet.

- Give the Name for it.
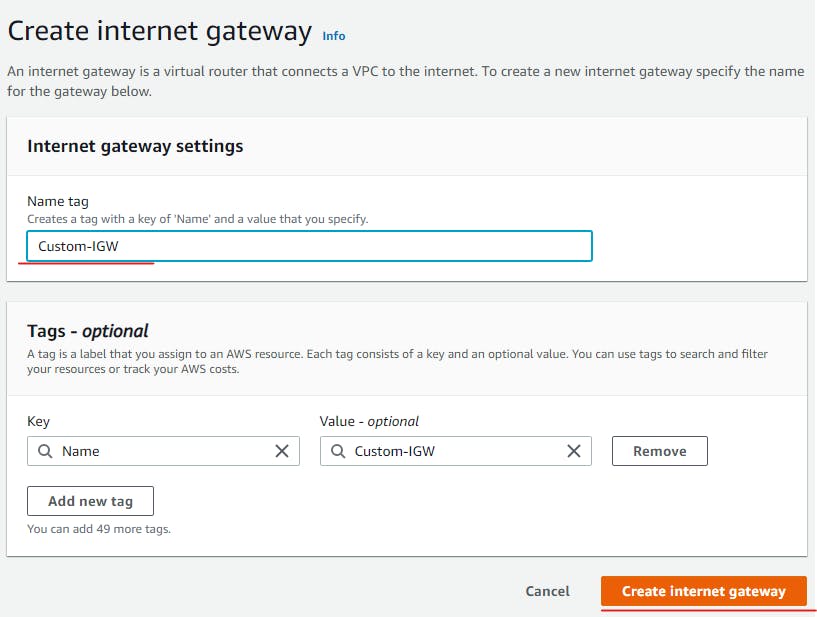
- And attach to our newly created Custom VPC.

4.Create new Route Table
- Now we want to create route table to route the traffic between subnets,internetgateway to public.

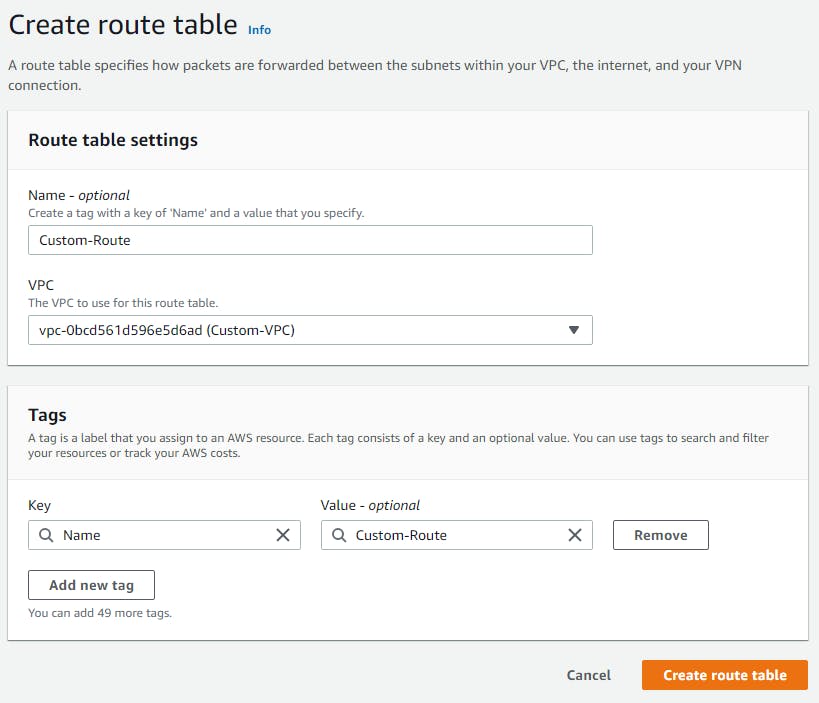
- Now we need to give the Route Table (Custom Route) a route to the internet. Edit routes.
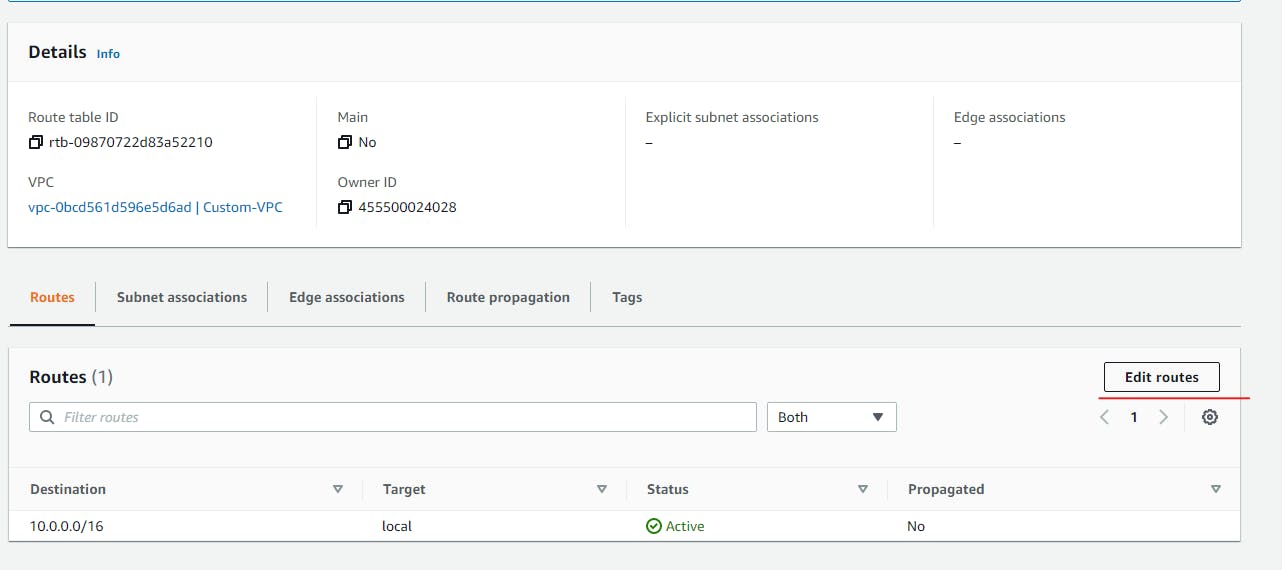
- And add new route sourece is 0.0.0.0/0 to Newley created Internet gateway.

- Lets associate a subnet we want to have internet access by going to the Subnet Associations and clicking on Edit.
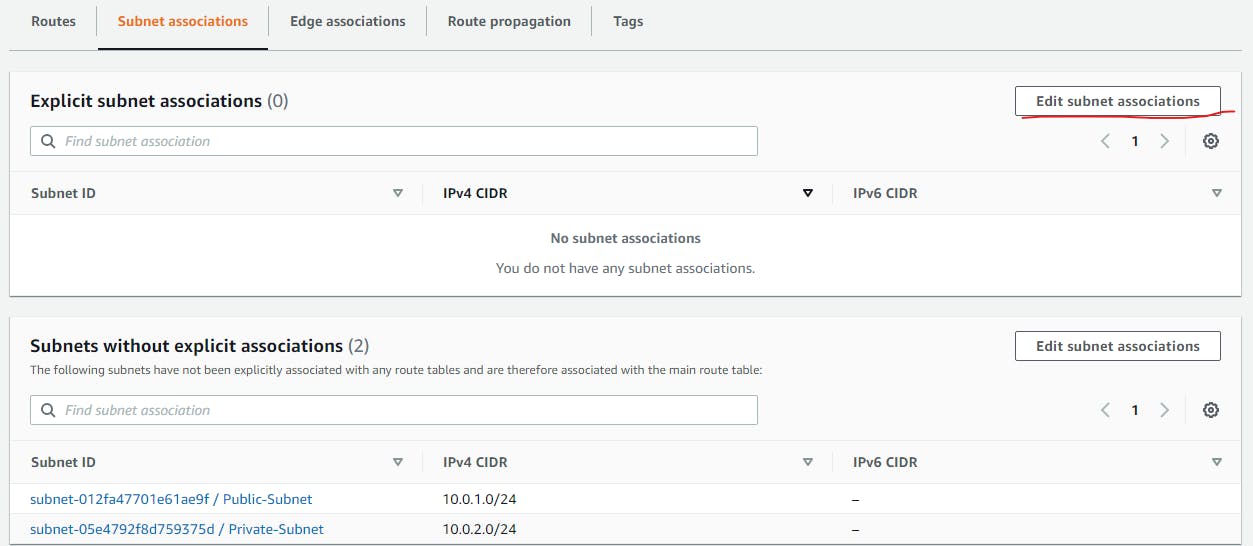
- I am onlyasocitae my public subnet

- Now Our Public Subent have internet access and private subnet not having the internet access.
- After that we wanto modify the auto assign public ip settings to our public subnet.

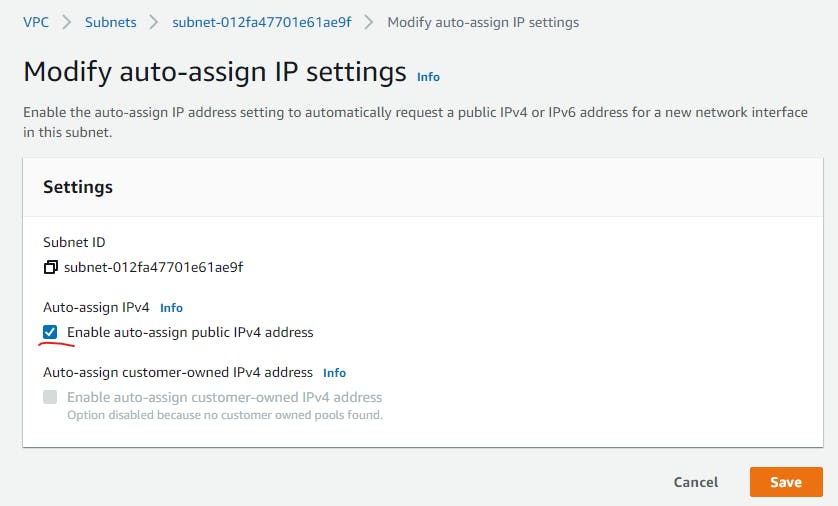
- That's all Guys We have Successfully create one Full Functional Customized VPC.
5.Test The Custom VPC
Now we will going to check our Custom VPC is working Properly or have any issue on the connectivity.
For that We are going to launch Two EC2 Instance on that VPC.
- One instance in Public Subnet other one is private subnet.
Public Subnet associated Instance
- Here I Have selected Custom VPC and choose public subnet.
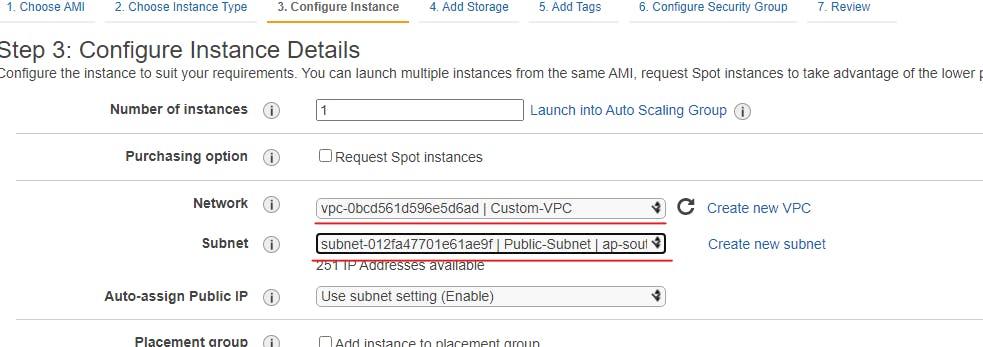
- Then launch the instance with all the default values.
Private Subnet associated Instance
- Here i have selected Custom VPC and choose private subnet.

- Then launch the instance with all the default values.
- Ok.Now we going to connect the instance via SSH.
Here Two EC2 Instacnes are running one is public other one is private.

See here there is no Public IP assigned for Private EC2 instance.
Public Subnet Instance
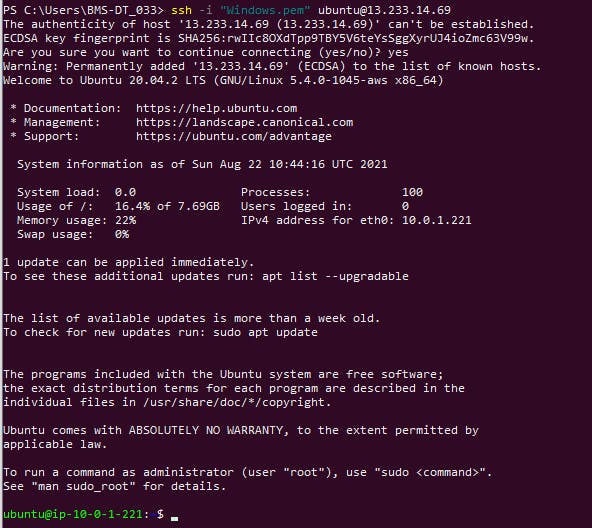
- Connect Private instance through Public Instance
- So i copied the .pem file to public instance.

- Now i am connected the public instance via ssh and then connect private instance from that.
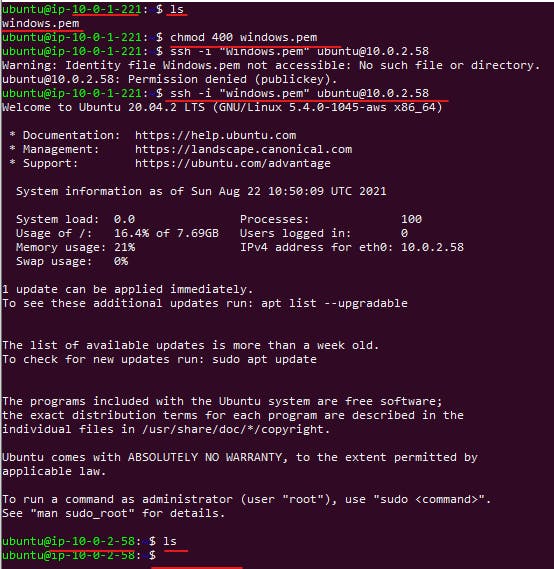
- Yeah its connected and working perfectly.
That's all guys... I have successfully created the Custom-VPC and configured and tested it.
