Install and Configure Magento on Ubuntu
Magento the famous E-Commerce Web Application


Introduction
Magento is one of the most popular open-source e-commerce platform written in PHP powered by Zend framework. In this tutorial, you will learn the steps required to install and setup Magento on your Linux/Ubuntu 20.04 server.
- Every Magento version only work with some specific version of packages like Php, Apache, Composer, MySQL and elastic search.
- First decide which version of magneto you are going to install. Because every version have different dependencies.
for your refence i am provide all version dependencies.
Ok Guys Now we start the Battle... 😁😁😁
System Requirements
The Below version we need for Magento 2.4.0 Package.
OS : Ubuntu 20
Composer : 1.X
Elasticsearch : 7.6
Database : MySQL
PHP : 7.3, 7.4
Web server : Apache 2.4
- Magento : 2.4.0
The installation have below parts
Enable Swap space
Install Apache Web Service
Create Virtual host for domain mapping
Install Elastic Search Service
Install PHP And its modules.
Install Composer
Install Mysql Server and create DB and User for Magento
Create Magento User account and get the credentials
Download the Package and compose it
Install the magento package
1. Enable Swap space
First we want to enable Swap Space for that . Basically This maganto server running many supported application's.
so we must enable swap space for that.
If you not aware how to enable swap space on linux instance check my other article. Here. 👇
2. Install Apache Web Service
- To install apache run the below command.
sudo apt install apache2
Output:

- To Start the service
sudo systemctl start apache2
- To Enable on system startup
sudo systemctl enable apache2
- Enable mod rewrite module.
sudo a2enmod rewrite

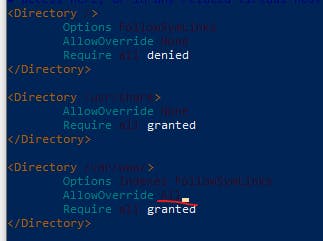
- To edit the apache config and change the value
vim /etc/apache2/apache2.conf

Change AllowOverride value none to All
- To restart the apache service.
sudo systemctl restart apache2
3. Create Virtual host for domain mapping
In apache we will create virtual host for our magento custom domain name mapping
So we cretae the config file in the below location.
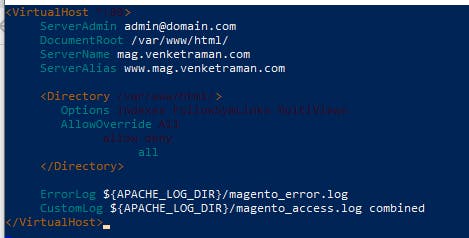
sudo vim /etc/apache2/sites-available/magento.conf

and add the below content.Change your domain name in the below exapmle in server name and server aliasis filed.
<VirtualHost *:80>
     ServerAdmin admin@domain.com
     DocumentRoot /var/www/html/
     ServerName mag.venketraman.com
     ServerAlias www.mag.venketraman.com

     <Directory /var/www/html/>
        Options Indexes FollowSymLinks MultiViews
        AllowOverride All
        Order allow,deny
        allow from all
     </Directory>

     ErrorLog ${APACHE_LOG_DIR}/magento_error.log
     CustomLog ${APACHE_LOG_DIR}/magento_access.log combined
</VirtualHost>
Output
now we want to enable the virtual host
sudo a2ensite magento.conf

sudo  systemctl reload apache2
Output:

4. Install Elastic Search Service
Elastic search is the local search engine to speed up to get the product query from MySQL and displayed in web.
Here we are going to install the elastic search version7
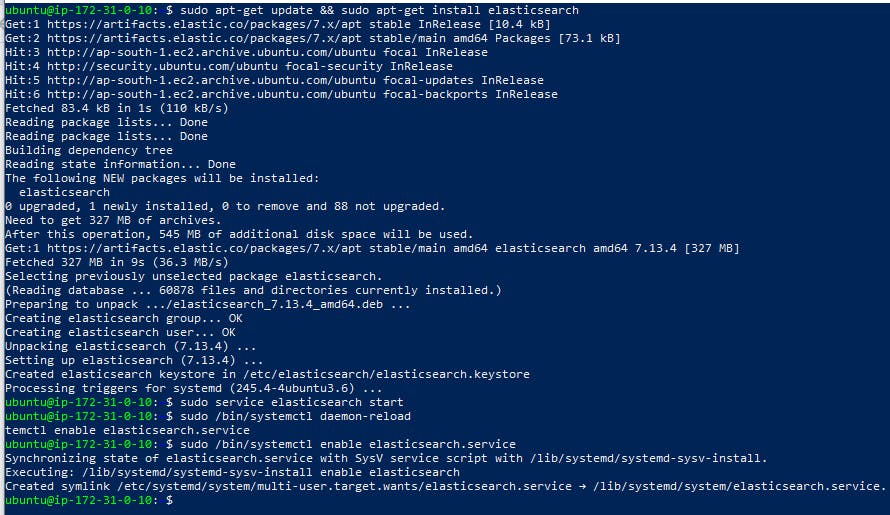
first add the elastic search GPG key.
sudo wget -qO - https://artifacts.elastic.co/GPG-KEY-elasticsearch | sudo apt-key add -
- Then install https transport
sudo apt-get install apt-transport-https
- add the elastic search repository source in source list.
echo "deb https://artifacts.elastic.co/packages/7.x/apt stable main" | sudo tee /etc/apt/sources.list.d/elastic-7.x.list
Output:

- Now we are going to install and start the elastic search.
sudo apt-get update && sudo apt-get install elasticsearch
sudo service elasticsearch start
- Ensure your elastic search will run on system startup and restart the service.
sudo /bin/systemctl daemon-reload
sudo /bin/systemctl enable elasticsearch.service
Output:
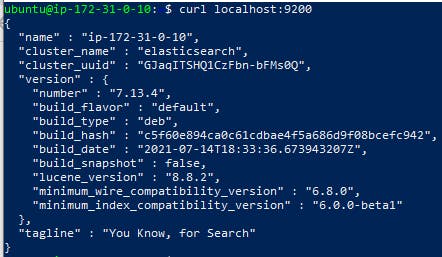
- To check the elastic search is workig properly.
curl localhost:9200
Output:
5. Install PHP And its modules.
To Install php using this commands.
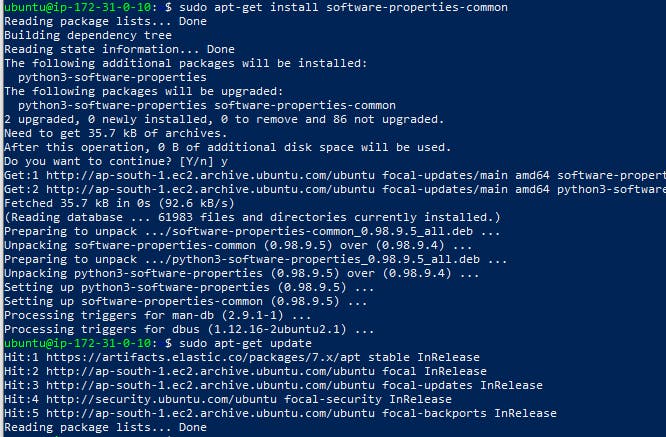
here we install the software properties comman instalation and update the os.
sudo apt-get install software-properties-common

sudo apt-get update
Output:
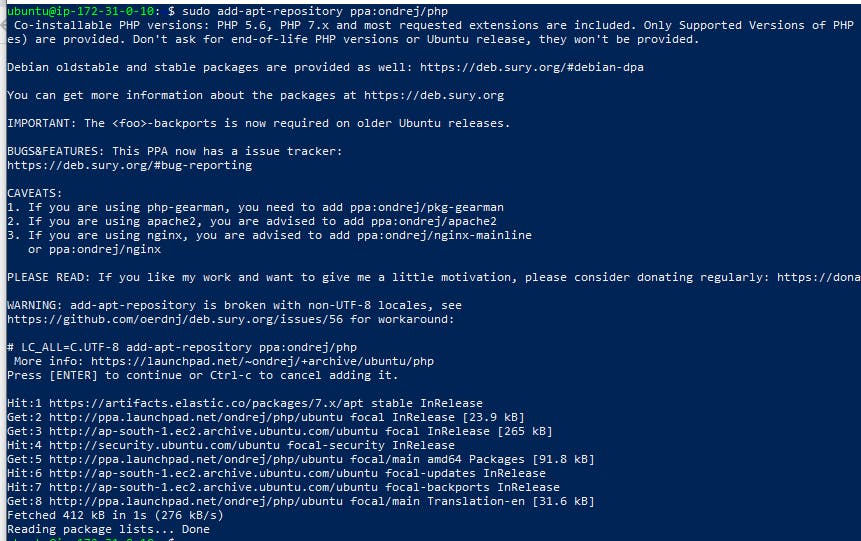
- Then add the php repository and update the os.
sudo add-apt-repository ppa:ondrej/php

sudo apt-get update
Output:
- Now install the Php 7.4 and its modules.
sudo apt-get install php7.4 php7.4-common php7.4-xml php7.4-curl php7.4-bcmath php7.4-intl php7.4-gd php7.4-zip php7.4-mysql php7.4-soap php7.4-cli php7.4-mbstring php7.4-xmlrpc php7.4-mcrypt php7.4-gmp libapache2-mod-php7.4
Output:

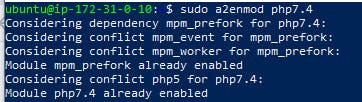
- Now we want to enable Php 7.4 with apache.
sudo a2enmod php7.4
Output:
6. Install Composer
We are download the magento source files from magento website and compose it using php composer.for that purpose we want to install composer.
sudo apt install composer
after the installation confirm by check the composer -v
composer -v
Output:

open the php.ini file from the below location
sudo vim /etc/php/7.4/apache2/php.ini

and change the below values
file_uploads = On
allow_url_fopen = On
short_open_tag = On
memory_limit = 512M
upload_max_filesize = 128M
max_execution_time = 3600
finally restart the apache server.
sudo systemctl restart apache2
check php is installed correctly .check php and its modules version.
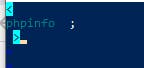
create php.phpfile in web root. and add the below content.
sudo vi /var/www/html/php.php

<?php
phpinfo();
?>

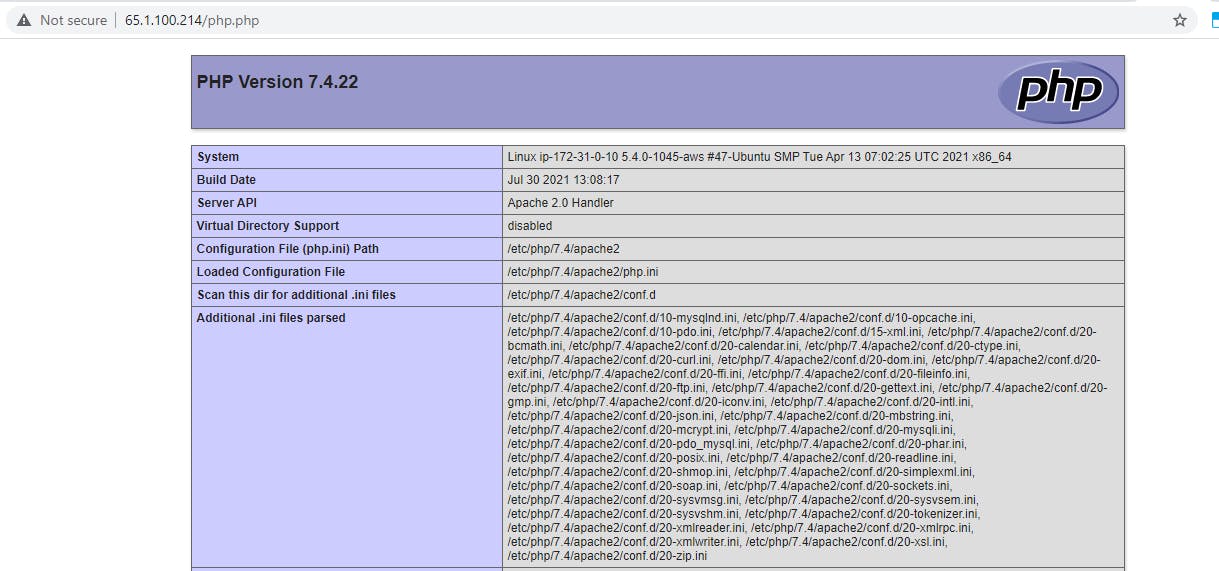
Now check browser the servers ip followed by php.php
Syntax : serverip/php.php
7. Install Mysql Server and create DB and User for Magento
Setting up MySQL Server
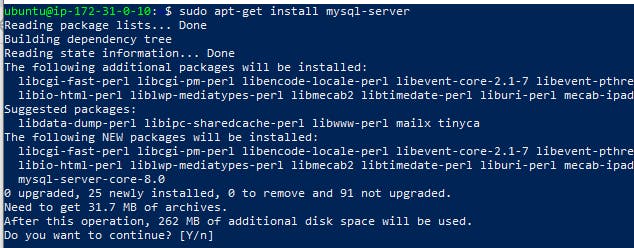
- To Install mysql server
sudo apt-get install mysql-server
- To start the mysql server
sudo service mysql start
- To configure mysql server
sudo mysql_secure_installation
Now we are going to do MySQL server Configuration.
- First it asking validate password plugin for strong password.
No
- Next it asking set root password .
Type the password
- Asking remove anonymous user
press y
- Asking Disallow root login
press y
- Asking remove test databases
press y
- Asking reload previlage to tables
press y

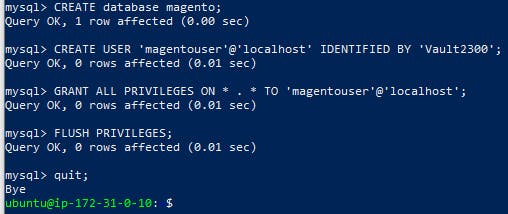
Create MySQL Database and users for Magento the following actions done here step by step.
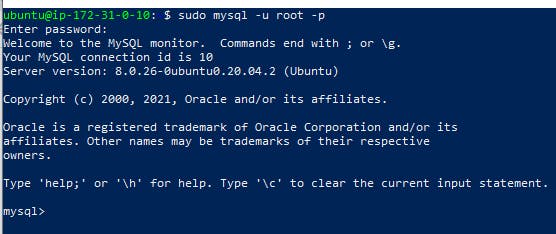
- Login to the MySQL with root password.
- Create database named magento.
- Create user name magentouser.
- Provide the rights on magento db for magentouser.
- Reload privileges' and exit.
sudo mysql -u root -p

CREATE database magento;

CREATE USER 'magentouser'@'localhost' IDENTIFIED BY 'Vault2300';

GRANT ALL PRIVILEGES ON * . * TO 'magentouser'@'localhost';

FLUSH PRIVILEGES;

quit;
Output:
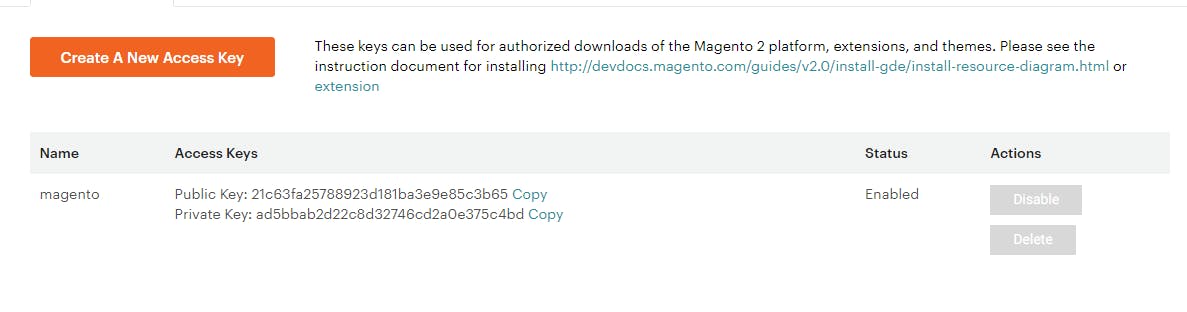
8. Create Magento User account and get the credentials
- create account in magneto portal
Login to Magento Marketplace
- and go to the below link create access key.
- genrate access keys
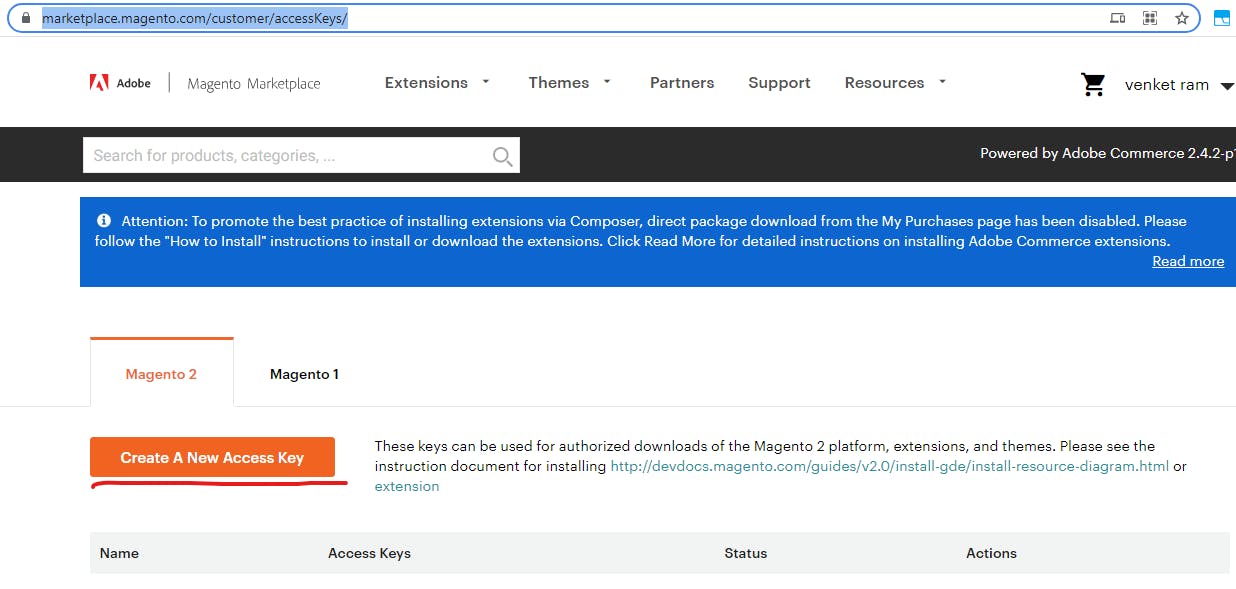
now its ask the name just enter any name then the key generated.
9. Download the Package and compose it
Now we are going to download the package from Magento repository.
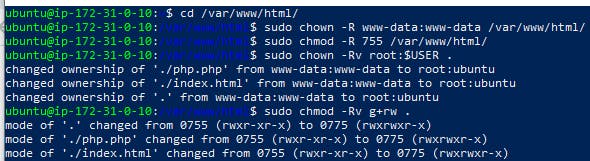
- First change to Webroot folder
- Give the permission for the Webroot.
cd /var/www/html/

sudo chown -R www-data:www-data /var/www/html/
sudo chmod -R 755 /var/www/html/
sudo chown -Rv root:$USER .
sudo chmod -Rv g+rw .
- Then execute the bellow command for update the composer.
php -d allow_url_fopen=on /usr/bin/composer update
- Then we are create the project via composer using the magneto online repo files. execute the below command.
composer create-project --repository-url=https://repo.magento.com/ magento/project-community-edition=2.4 magento
- here it asks the access keys and secret keys. provide that you previously generated in magneto portal.

- After this change change your working directory as magneto installation folder. Change the folder and file permission using the below commands. change the ownership of the folder to your current user.
cd /var/www/html/<magento install directory>
find var generated vendor pub/static pub/media app/etc -type f -exec chmod g+w {} +
find var generated vendor pub/static pub/media app/etc -type d -exec chmod g+ws {} +
chown -R :www-data . # Ubuntu
chmod u+x bin/magento
all done. hurry...
10. Install the magento package
We are now in final part. Install the composed project using the below command.
you want to change the below values to your custom values.
base URL = Ur magento hosted url
db host = ur db server name
db name = ur magento db name
db user = db user who have the rights to access magento
db-password = ur db user password
admin first name and last name = ur wish
admin user name and password = ur wish
admin email id = mail id for communication
currency = ur customer's using currency
time zone =ur customer time zone
use rewrite = url rewrite enabled
search engine name , version , host and port number.
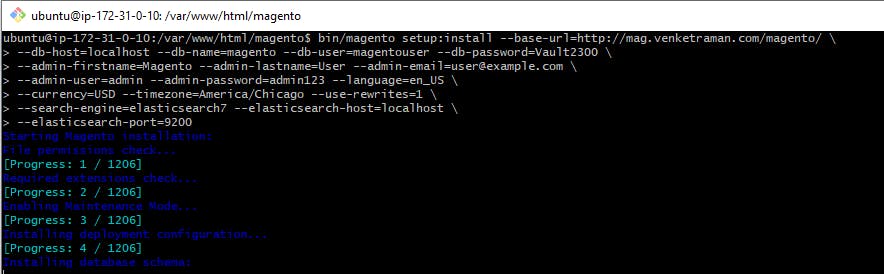
bin/magento setup:install --base-url=http://mag.venketraman.com/magento/ \
--db-host=localhost --db-name=magento --db-user=magentouser --db-password=Vault2300 \
--admin-firstname=Magento --admin-lastname=User --admin-email=user@example.com \
--admin-user=admin --admin-password=admin123 --language=en_US \
--currency=USD --timezone=America/Chicago --use-rewrites=1 \
--search-engine=elasticsearch7 --elasticsearch-host=localhost \
--elasticsearch-port=9200
Now the installation Started....
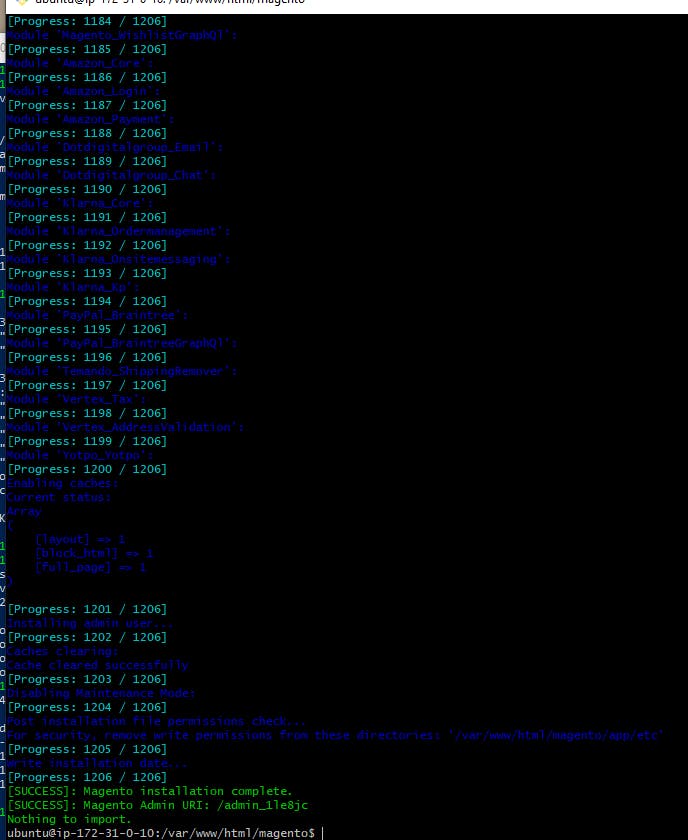
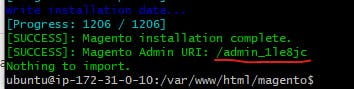
Here it shows the Admin URI... just copy and save it in any location. later we will access using that URI.
Now we want to open the magento on browser using our custom domain name.for that we want to enable devloper mode and execute some commands.commands given below.
bin/magento deploy:mode:set developer
bin/magento se:up && bin/magento se:d:c && bin/magento c:c
bin/magento cache:clean

chmod -R 777 pub/static /var generated/*

- If you missed to copy the admin URL you can get this edit from the file
vi app/etc/env.php
- Inside this file find front name=

Finally we got the Magento site
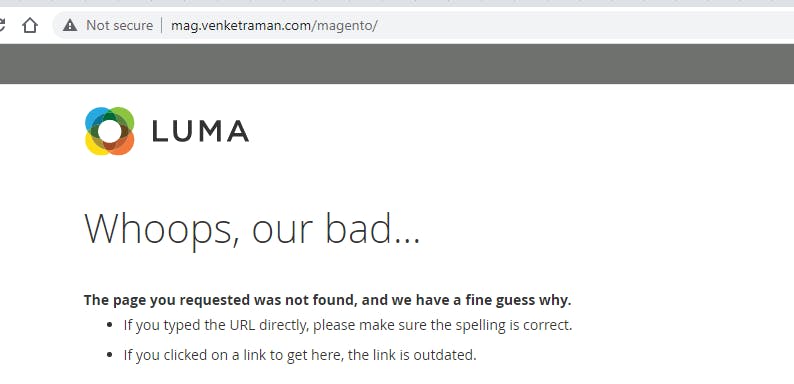
Edit the URL and paste the admin URL. like below.
My Admin URL : admin_1le8jc

last one thing is magneto using two factor authentication. If you are familiar with configuring relay server try magneto site for that. otherwise using the below command to disable the two factor authentication.
bin/magento module:disable Magento_TwoFactorAuth

- Now going to sign-in with your user name and password

- Now we are login here successfully
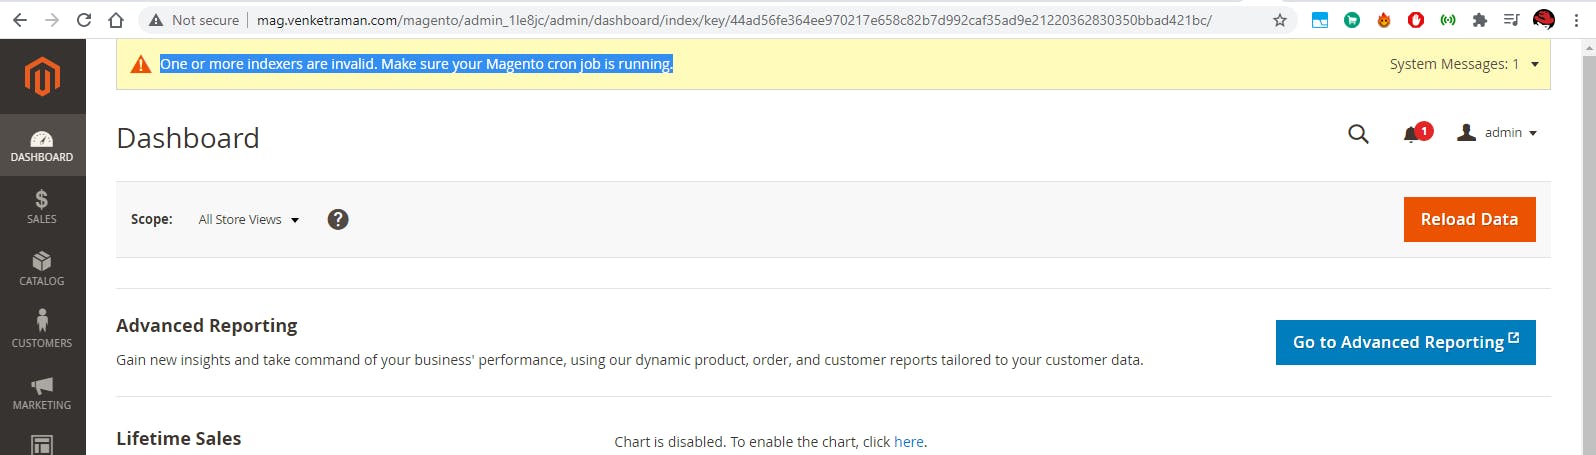
- But here it shows some error.

- We want to re-index the magneto.
- For this u want to change the working directory to Webroot and then magneto folder.
ubuntu@host/var/www/html/magento$
bin/magento indexer:reindex
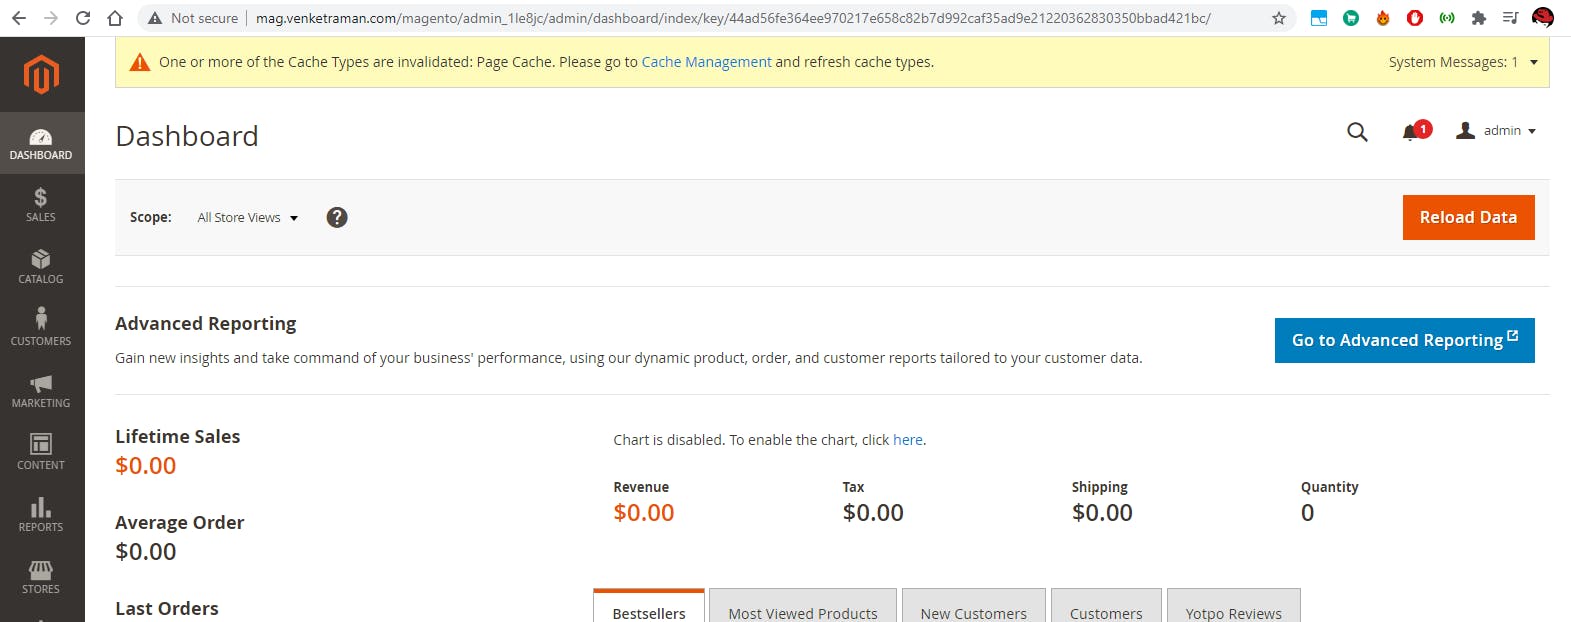
- Now you successfully logged in your magneto server.
