

Ant Media Server is a software that can stream live and VoD streams. It supports scalable, ultra low latency (0.5 seconds) adaptive streaming and records live videos in several formats like HLS, MP4, etc.
We can create our own live streaming server to relay our content in web using this service.
Here we are going to explain installation of ant media server .
Prerequisites
Ubuntu 18 server
Minimum 1 GB of Ram 1 core processor 8 GB of disk space
Domain Name to publish on internet
ports we are going to allow
TCP 1935 =RTMP
5080 = HTTP
5443 = HTTPS
5554 = RTSP
22 = SSH
UDP UDP:5000-65000 (WebRTC)
First update the OS
apt-get update
Now we are going to download the package from the GitHub and install it. usually ant media frequently update their packages in git hub you can directly get all the releases from the below link
https://github.com/ant-media/Ant-Media-Server/releases/
here i am going to download the latest version
wget https://github.com/ant-media/Ant-Media-Server/releases/download/ams-v2.3.3.1/ant-media-server-2.3.3.1-community-2.3.3.1-20210609_2132.zip
and download installation script to install the package
wget https://raw.githubusercontent.com/ant-media/Scripts/master/install_ant-media-server.sh
change the script permission
chmod 755 install_ant-media-server.sh
now we execute the script to install the package
./install_ant-media-server.sh ant-media-server-*.zip true
the installation takes 3 to 5 mins

to check the status of ant media service use the below command
systemctl status antmedia.service
and result willbe like this
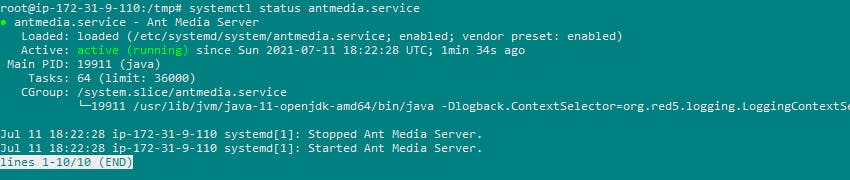
the below commands are control the ant media service
    systemctl start antmedia
    systemctl stop antmedia
    systemctl restart antmedia
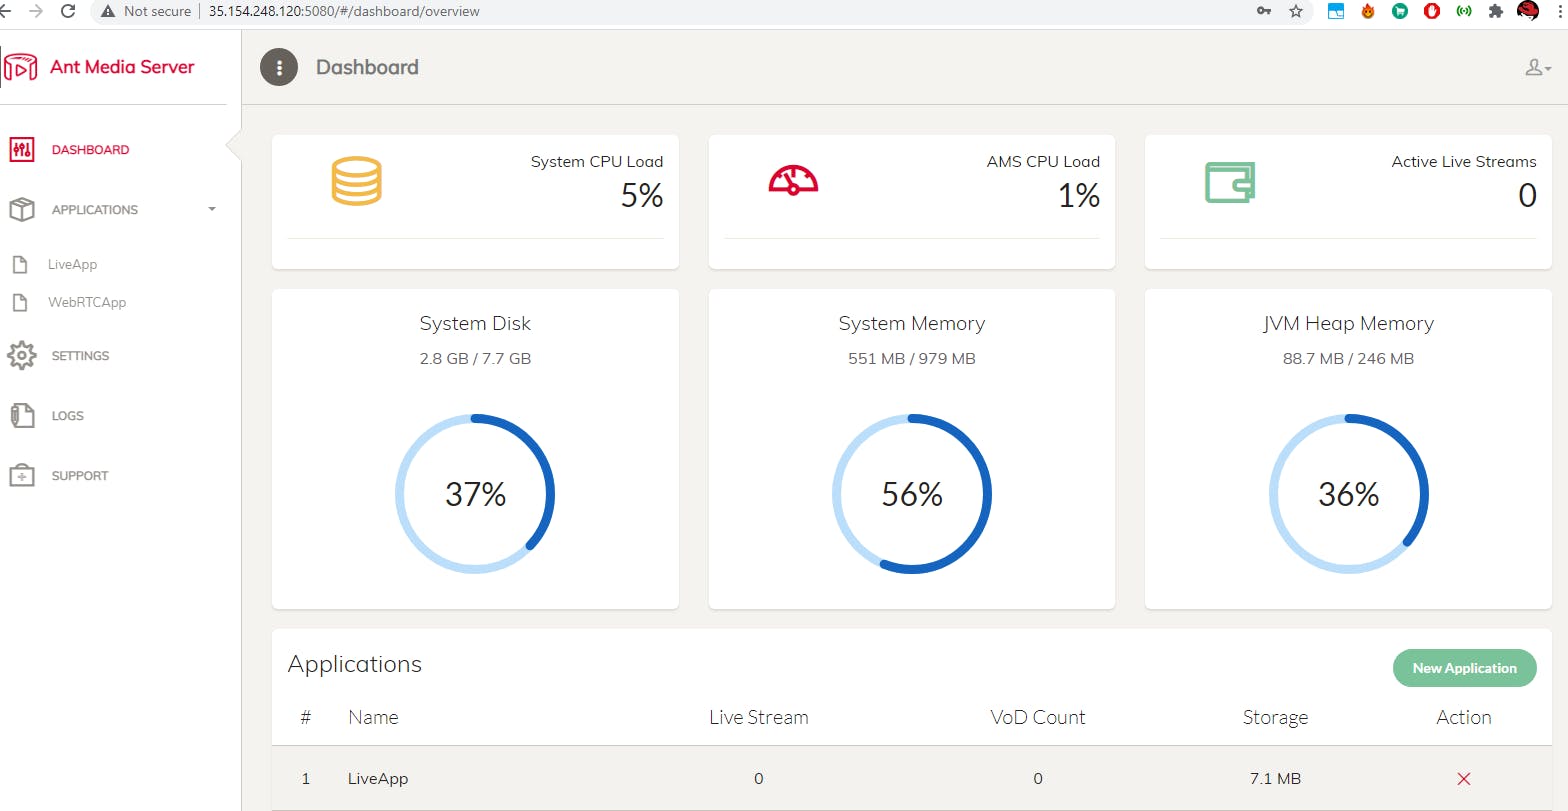
now you can access your ant media dashboard using your public ip address

first we create the user in this screen and login to the dashboard.
the dashboard looks like this.
then allow the required ports in firewall
ufw allow 1935,5080,5443,5554,80,443,22/tcp
now we are going to secure our website so that first we stop the ant media service
systemctl stop antmedia.service
change your location to ant media server to execute the SSL installation script
cd /usr/local/antmedia/
and give your domain name after the -d switch
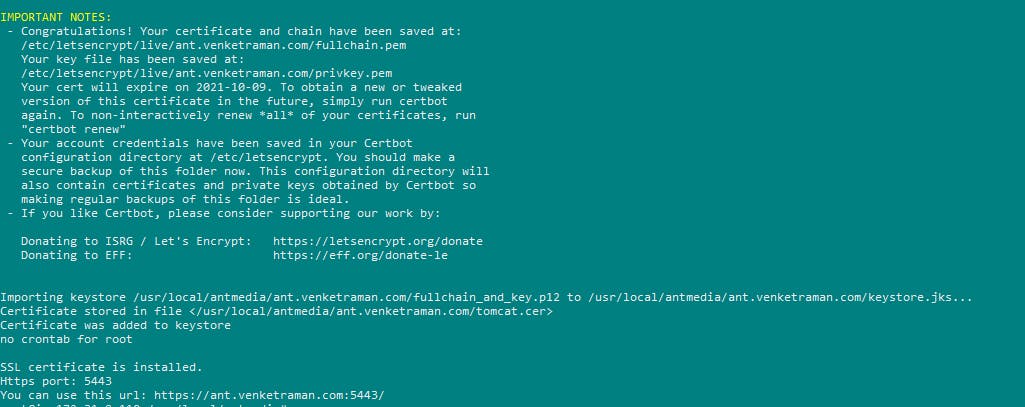
./enable_ssl.sh -d ant.venketraman.com
now you are successfully secure your server with ssl.
Forward Default http(80), https(443) Ports to 5080 and 5443
Generally, port forwarding is used to forward default ports to the server's ports in order to have ease of use. For instance let's forward 80 to 5080, just type the command below.
sudo iptables -t nat -A PREROUTING -p tcp --dport 80 -j REDIRECT --to-port 5080
sudo iptables -t nat -A PREROUTING -p tcp --dport 443 -j REDIRECT --to-port 5443
After running the command above, the request goes to 80, 443 is being forwarded to 5080, 5443 likewise
now we again start the ant media service
systemctl start antmedia
now check your domain name.it will be automatically redirects to https.

now you going to check the below url (ur domain name/WebRTCApp)
ant.venketraman.com:5443/WebRTCApp

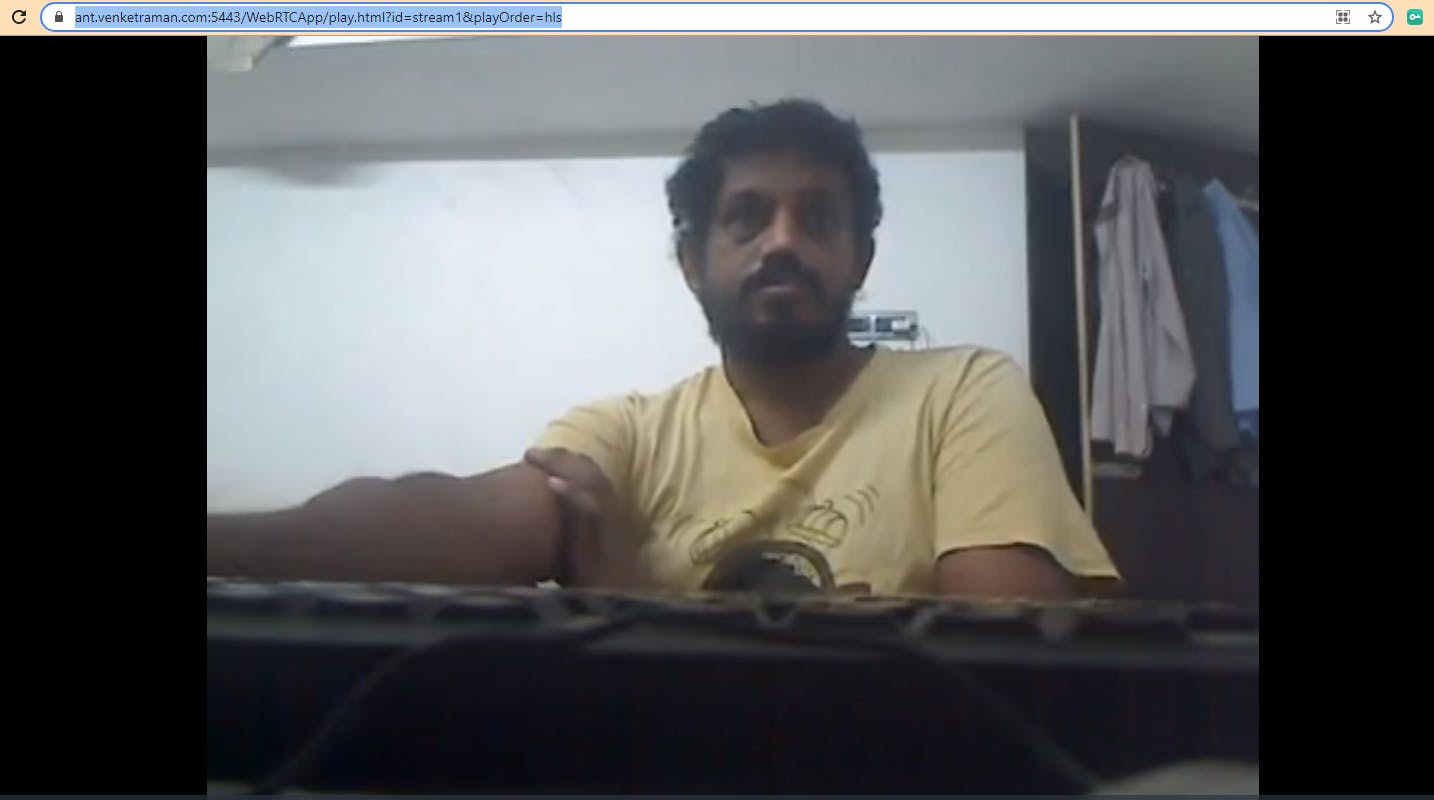
now we are going to publish our live streaming content. click the publish button your stream will be online.
to check the live stream content use the below url in your browser.
Syntax
https://yourdomainname:5443/WebRTCApp/play.html?id=stream1&playOrder=hls
The installation and configuration completed. results will be verified.